“When an old person dies, a library burns down.”
~ Amadou Hampâté Bâ, Malian writer and historian
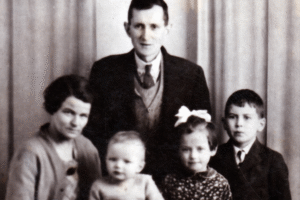
You’ve got a few names scribbled in an old Bible, a half-remembered story about a great-grandfather who emigrated and a handful of fading, undated photographs of people you don’t recognise. There’s something mysteriously magnetic about these fragments – the names belong to you, somehow, and you want to know who they were. The faces in the photographs look back at you, and the pull is tangible: these people are your people, and their stories are waiting to be discovered. But how?
Family history research isn’t about finding the right website and hoping for the best. Online databases make it tempting to believe that researching your family history is an exercise in instant gratification – click a hint, download a ready-made tree and you’re done. But if you want stories rather than just statistics and meaning rather than just names, it takes more than that. Real family history research is about transforming records into narratives, dates into contexts and names into people whose lives you can understand and celebrate.
This article walks you through that process: the practical steps of gathering evidence and verifying facts, yes, but also the deeper work of understanding what those facts meant, of building not just a family tree but a family story worth preserving and passing on.
Start with what you have
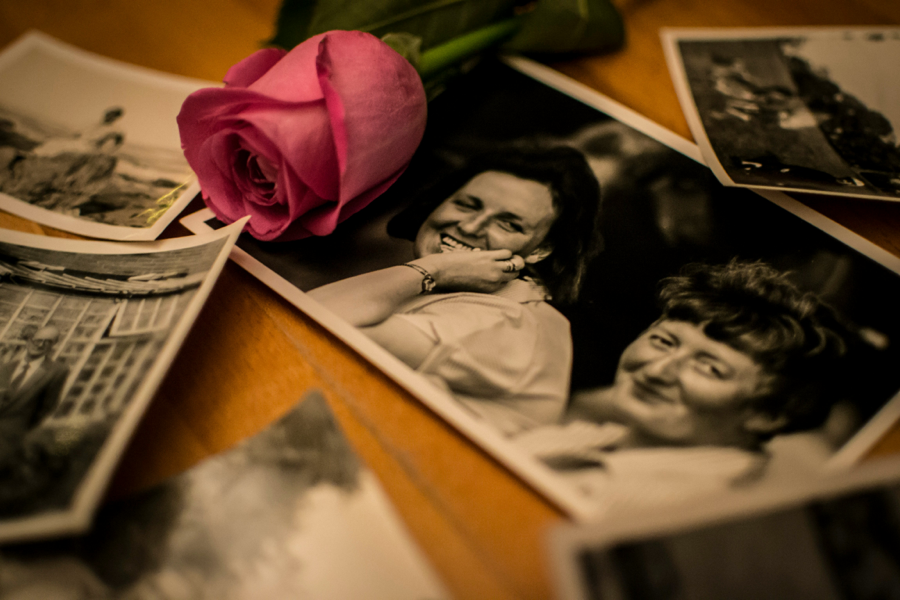
To begin with, before you open a single genealogy research website, sit down with the people who remember. Family history research begins not with databases but with oral history and living memory – the stories, photographs and documents already in your possession or held by those relatives with whom you are able to speak.
This is where your family heritage and your family roots live. A birth certificate might tell you when someone was born, but it’s a grandmother’s memory that tells you what kind of person they became. Both matter, but one provides facts and the other gives you a story.
So, start by gathering what documents and heirlooms are already there:
- Birth, marriage and death certificates; passports and naturalisation papers
- Family Bibles, letters, diaries, funeral cards and memorial booklets
- Photographs and, critically, the stories behind them – who took this? Where were they going? What was the occasion?
- Address books, school reports, military papers and employment records

Then talk to living relatives. Prepare questions, take notes and – with permission – record the conversation. Don’t just collect facts, however; collect stories:
- Full names, maiden names, nicknames… and why people were called what they were called
- Locations of births, marriages and deaths… and what those places were like then
- Occupations… and what the work actually involved
- Migrations… and why people left, what they left behind and what they hoped to find
- Personality, habits, beliefs, fears and hopes – the texture of who they were
- Family legends – even if they’re not quite true, legends tell you what a family valued
The facts you uncover will anchor your research, but the stories will give it meaning. Even details that seem trivial – a childhood nickname, a family joke, the way someone made tea – are the details that will turn ancestors in a family tree into people you can ‘know’ and understand.
Organise what you know
Now it’s time to impose some structure. Family history research spirals into chaos if you chase every thread at once, but the solution is simple: work backwards from yourself, one generation at a time, one person or family line at a time.
Start by sketching out what you know for certain: your parents, their siblings, your grandparents. You can do this on paper, in a spreadsheet or using a free online tree builder like FamilySearch – it doesn’t matter yet. The point is to map what you know and identify what you don’t.
Only include facts that you can document or verify. Then stop and choose a single, answerable question – not “tell me about my grandfather’s life”, which is too broad, but something specific:
- Who were his parents, and where did they come from?
- Where was she born, and what was that place like?
- When did they arrive in Canada, from where and why?
This is the question you’ll research next, and everything that follows – every record you search, every archive you contact – should be aimed at answering it. Once you’ve done so and recorded your evidence, you can move on to the next question.
The evidence mindset: proving the story
Here’s where genealogy and family history intersect. To tell a true story, you need to know that it’s true. To write about the life of your great-grandmother, for instance, you need to be certain that you’re writing about the correct person and not someone else’s ancestor who happens to have the same name.
When you search online databases, you’ll find thousands of family trees built by other researchers. Some are meticulously sourced, but many are not, so it’s important to treat every tree you encounter – no matter how detailed – as a lead, not a source. Other people’s trees show you where to consider looking, but only original records prove what happened.
A birth certificate is proof. A census entry is proof. A marriage register signed by witnesses is proof. Someone else’s unsourced family tree that says ‘John Smith, b. 1847, Shepton Mallet’, however, is a hint at best and quite possibly wrong.
To verify that a person in a record is your person, you need a cluster of matching details, not just a name. “John Smith” is not enough, but “John Smith, age thirty-two, living in Harlem, married to Elizabeth, working as a dock laborer, with a son named Llewellyn and a neighbor named Barry Potts”? That’s a match you can trust, especially if multiple records agree.
Adopt a two-source habit for critical facts. If you’re linking a child to parents, find at least two independent records that confirm the relationship: a birth certificate and a census entry, or a baptism record and a will. This will prevent the cascading errors that occur when you build ten generations on a single guess.
Finally, keep uncertainty visible. Mark facts as high, medium or low confidence based on your evidence. If you’re not sure, say so. A family history built on transparent uncertainty is more valuable than one built on silent assumptions, because honesty about what you know and don’t know is part of the story.
Records that unlock family stories
Family history is built on a handful of essential record types that appear, in some form, in almost every country, so, when you’ve chosen your research question, you need to identify where to look.
Civil registration
Birth certificates give you names, dates, places and parents. Marriage certificates add spouses, witnesses (often relatives) and fathers’ names. Death certificates include age, cause of death and the informant – usually family.
But look deeper. A father’s occupation on a birth certificate tells you about social class and daily life. Witnesses at a wedding are often clues to relationships. The informant on a death certificate might reveal who was present at the end, who cared and who remained.
Census and household records
Censuses capture entire households every ten years: names, relationships, ages, birthplaces, occupations and addresses. Their power lies in how they track change across decades – migrations, new arrivals and elderly parents moving in. Ages are sometimes approximate, but household structure reveals who lived with whom, who stayed close and who left.
Church and religious records
Before civil registration, churches kept the records. Baptism records name the child, parents and often godparents (frequently relatives). Marriage records name the bride, groom and witnesses.
The records of ancestors who belonged to minority religious communities were often kept separately by their own congregations.
Probate records and wills
Wills name beneficiaries, describe relationships, reveal married names, and explain tensions and loyalties. They also tell you what people valued: who they provided for, who they trusted, and what possessions mattered.
Property inventories reveal wealth and lifestyle in detail.
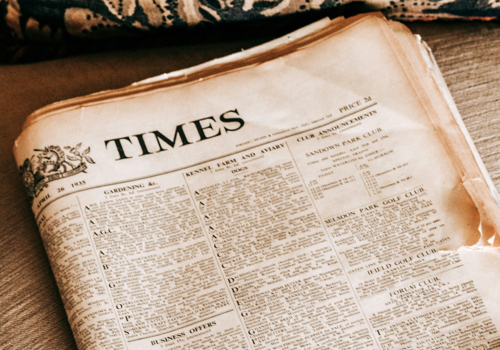
Local newspapers
Obituaries give biographical detail and family connections. Social columns mention community involvement – the texture of daily life. Court reports reveal difficult truths – poverty, violence and tragedy.
Not all newspapers have been digitised, so treat them as a later-stage resource.
Search and save effectively
Records are inconsistent, handwriting gets misread and clerks made mistakes, so the difference between productive research and frustration is knowing how to search effectively. Adopting these tactics will save you hours:
- Try spelling variants and transcription errors. ‘Smith’ and ‘Smyth’, ‘Catherine’ and ‘Kathryn’. Swap one letter at a time.
- Search broadly, then filter. Start with surname and location, then narrow. Tight filters can exclude the record you need because one detail is wrong.
- Use approximate birth years. Ages shift across records. If someone was forty-two in 1851, search birth years 1805–1815, not just 1809.
- Search sideways. Can’t find your ancestor? Find their sibling, spouse, a witness or a neighbour. Those trails will lead back.
- Record negative searches. Note ‘searched X for Y, 1820–1850, nothing found’ so you don’t waste time re-checking later.
Get organised
The worst feeling in family history research is knowing that you found something crucial six months ago but having no idea where you saved it. Avoid this by building a simple system now, before your files multiply.
- Create a folder structure – and stick to it. Organise by surname or by person – pick one method. Inside each folder, save record images, transcriptions and notes.
- Use consistent file names. A format like 1891_Census_Pheltz-John_Worcester_UK_Source.pdf tells you, at a glance, what, who, where and when.
- Keep a research log. A simple spreadsheet on which to record date, database searched, query, result and next steps prevents re-searching dead ends and helps you pick up where you left off.
- Add citations in your notes. Even informal ones: ‘1901 census, RG13/2345, page 12’ or ‘Ancestry.com, London baptisms 1813–1906’. If you need to verify information later, you’ll know where it came from.
- Keep a file for family narratives. As you research, write down the emerging story in sentences, not just data points.
‘John Smith was born in Sedburgh in 1847, the son of a dock labourer. By 1881 he’d moved to Middleham and was working as a railway porter. He married Elizabeth in 1883; their first child died in infancy.’
This becomes the foundation of the story you’ll tell.
When the trail goes cold
Every researcher hits brick walls. Someone vanishes from records, you can’t connect a child to parents, two people with the same name blur together… This isn’t failure; it’s normal, and there are ways to move forward:
- Re-check assumptions. You might have a wrong birthplace, a wrong decade or a nickname instead of a legal name, so go back to what you know for certain and question everything else.
- Work forwards instead of backwards. Can’t find parents? Follow the children. Track siblings through census records, find witnesses at weddings, or trace neighbors who moved with them. These connections often lead back.
- Check for boundary and jurisdiction changes. Counties were sometimes redrawn, parishes merged, and record-keeping shifted. Your ancestor might not have moved, but maybe the map did.
- Consider name variations. Names were anglicised, spelled phonetically or shortened. The person you’re looking for might not appear under the name you expect.
And sometimes: accept that you won’t find what you’re looking for. Write what you know, acknowledge what you don’t and tell the story you can tell. Honest uncertainty is better than false certainty.
Know where to look
The research process is the same everywhere; what changes is where records are held and what’s available online.
United Kingdom
The National Archives offers guidance on census records and national collections. For civil registration, use the General Register Office (England/Wales) or National Records of Scotland. PRONI and GRONI hold Northern Irish records.
United States
The National Archives holds federal census records and provides research guides. For vital records, you’ll need state-level offices.
Canada
Library and Archives Canada provides census records, immigration databases and genealogy guidance. For vital records, the provinces maintain their own archives.
India
The Civil Registration System operates at state level – each state maintains its own portal. The National Archives of India holds colonial-era records, as do regional state archives.
Australia
The National Archives of Australia and state archives hold rich collections. Australia never conducted detailed national censuses, so state-based records are your best starting point.
From records to stories: building a family history, not just a family tree
You now have a method: gather evidence, ask questions, verify facts, stay organised and know where to look. You’re building a family tree – a pedigree of proven relationships, accurate dates and verified places. That’s genealogy, and it’s essential.
But genealogy alone is not family history.
Genealogy is proof: names, dates, places, relationships. It’s the skeleton. Family history is the flesh on those bones – the stories, the context and the texture of lived experience. It’s about understanding not just when your great-grandmother – the matriarch of her household – was born but what her world was like when she was twenty. What did she eat? What did she fear? What made her laugh?
Think about your own life. If someone reduced you to a birth certificate, a census entry and a death record, would that capture who you are? Your life is more than bare facts; it’s the holidays you remember, the choices you made, the people who shaped you and the moments that defined you.
The same applies to every member of your lineage. Once you’ve established the facts, ask the next question: what was it like to be them?
This is where family history begins – by layering context onto facts:
- What was happening in the world when they were young? Wars, famines, migrations, social upheavals?
- Was their town rural or urban, thriving or declining, tight-knit or transient?
- What did their occupation involve? What did they make? What risks did they face?
- What churches, schools and institutions shaped their life and community?
- What do maps, photographs and local histories tell you about their world?
You might never know if your great-grandfather – the patriarch of a line you’re only now uncovering – liked music or hated Mondays, but you can know what his street looked like, what his neighbours did, what his children died of and what wars he lived through. That’s context, and context turns names into people.
So, as you research, collect more than just records:
- Collect maps that show the streets where they lived.
- Find photographs of their towns.
- Read local histories to understand their communities.
- Search newspapers for events they lived through – strikes, celebrations, disasters.
- If they emigrated, research what conditions they left behind and what they hoped to find.
- Look for objects, artifacts and cultural practices that defined their time and place.
Then write it all down, not as data points but as narrative. Tell the story of a life lived in a particular time and place, shaped by particular circumstances and defined by particular choices. Use records as your foundation but build upward into story that could grow into a family history or tribute book.
This is how family history becomes something more than a collection of names and dates. It becomes a preserved identity, a record of values and experiences, a narrative and a heritage to pass forward – not just to prove who your ancestors were but to help every descendant understand who they were, what they lived through and how their lives made yours possible.
Family history, at its best, is not left scattered across databases and documents. It is curated, contextualised and captured as a story – one that honours the past and speaks to the future.
Key points
You don’t need a subscription, specialist software or a weekend blocked out to begin. You need one ancestor and one question. Here’s how to make progress today:
- Pick one ancestor. Start with a grandparent – someone you know existed, whose name you’re certain of.
- Gather three home sources. A certificate, a photograph, a story told by a relative – anything that gives you a fact or context to build from.
- Talk to one relative. Ask about names, places, and dates but also about personality, habits, and stories. Take notes.
- Write one research question. Where was she born? Who were his parents? What was their occupation? Keep it specific.
- Find one record that answers it. Search a free database or national archive portal.
- Save it properly. Use a clear filename, note where you found it and add it to your tree or research log.
- Write one paragraph of narrative. Write what you’ve learned as a story: ‘Mary Smith was born in Llandeilo in 1889, the daughter of a coal miner. By 1901, the family had moved to…’ Each paragraph you add will preserve family stories for future generations.
That’s it. One question answered, one piece of evidence saved, one paragraph of story written. Then repeat. This is how family histories are built – one careful step at a time, as lives understood and preserved as narratives worth passing on.

Written by Steve Edwards, LifeBook Memoirs editor